In the heart of every bustling kitchen, whether professional or home-based, lies a fundamental truth: the mastery of knife skills is not just about speed, but about safety, efficiency, and unlocking a world of culinary possibilities. More than just chopping ingredients, proper knife handling transforms cooking from a chore into an art, ensuring consistent results, enhancing flavors, and significantly reducing the risk of accidents. Dive into this comprehensive guide to elevate your kitchen prowess and gain the confidence of a seasoned chef, one precise cut at a time.
The Foundation of Safe Knife Handling
Before you even make your first cut, understanding the principles of safe and effective knife handling is paramount. It’s the bedrock upon which all other skills are built, ensuring a long and injury-free cooking journey.
Choosing the Right Knife
The right tool for the job is a mantra for a reason. While a chef’s knife is often considered the workhorse, a well-rounded collection enhances versatility.
- Chef’s Knife: Your primary tool for chopping, dicing, mincing, and slicing. A good 8-10 inch chef’s knife is indispensable.
- Paring Knife: Ideal for intricate tasks like peeling, trimming, and creating garnishes. Typically 3-4 inches long.
- Serrated Knife: Perfect for cutting through items with tough exteriors and soft interiors, such as bread, tomatoes, and roasted meats, without crushing them.
- Utility Knife: A versatile knife, usually 5-7 inches, suitable for tasks too large for a paring knife but too small for a chef’s knife.
Actionable Takeaway: Invest in quality knives. A sharper, well-balanced knife is safer and more efficient than a dull, cheap one.
The Proper Grip (The Claw and The Pinch)
Your grip on both the knife and the food is crucial for control and safety.
- The Pinch Grip: This is the professional standard for holding a chef’s knife. Pinch the heel of the blade between your thumb and forefinger, wrapping your remaining fingers around the handle. This grip offers maximum control over the blade’s movement.
- The Claw Grip: When holding food, curl your fingertips inward, creating a “claw” shape. The knuckles of your guiding hand (non-knife hand) should rest against the flat side of the knife blade, acting as a guide and protecting your fingertips from the blade.
Practical Example: When dicing an onion, use the pinch grip on your knife. With your other hand, hold the onion half flat on the board, curling your fingers into a claw, using your knuckles to guide the knife for vertical cuts.
Essential Safety Rules
Adhering to these rules will dramatically reduce the risk of accidents in the kitchen.
- Always Use a Stable Cutting Board: A non-slip surface prevents food and the board from shifting, which can lead to cuts. Place a damp cloth or non-slip mat under your board.
- Keep Knives Sharp: Counter-intuitively, a dull knife is more dangerous than a sharp one. It requires more force to cut, increasing the likelihood of slipping. According to culinary experts, a significant percentage of kitchen accidents involve dull knives.
- Pay Attention: Focus entirely on the task at hand. Distractions are a common cause of injury.
- Never Try to Catch a Falling Knife: Step back and let it fall. Your fingers are more valuable than a knife.
- Proper Knife Storage: Store knives in a block, on a magnetic strip, or in a knife roll to protect both the blade and your hands. Never leave knives loose in a drawer.
- Pass with Care: If handing a knife to someone, pass it handle-first, clearly stating, “Knife.”
Actionable Takeaway: Make these safety practices habitual. They are as important as the cutting techniques themselves.
Mastering Fundamental Cutting Techniques
With a solid foundation in safety and grip, it’s time to explore the core cutting techniques that will make your food prep more efficient and your dishes more appealing.
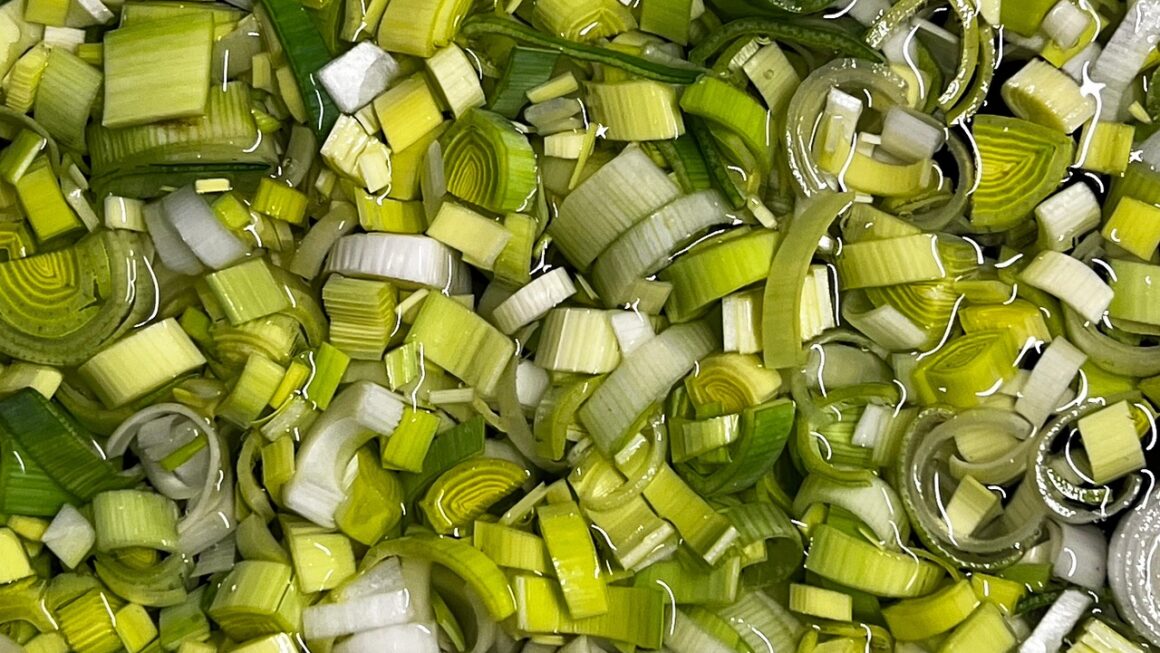
The Slice and Dice: Uniformity is Key
Uniformly cut ingredients cook evenly, ensuring consistent texture and flavor in your final dish.
- The Rocking Motion: For most chopping and slicing, use a smooth, rocking motion with your chef’s knife. The tip of the blade remains in contact with the cutting board, while the heel lifts and lowers.
- Dicing: This involves creating small, uniform cubes. Start by creating even slices, then stack them and cut into strips (batonnet), and finally dice those strips into cubes.
- Slicing: Long, smooth strokes are key. Don’t saw back and forth. For delicate items, use the knife’s full length, pulling or pushing through the food.
Practical Example: To dice an onion: cut it in half, peel, and lay flat. Make several horizontal cuts (not all the way through the root end), then vertical cuts, and finally slice across to create dice.
Mincing Garlic and Herbs
Mincing creates very fine pieces, allowing ingredients to disperse evenly and release maximum flavor.
- Garlic: Smash garlic cloves with the side of your chef’s knife to easily remove the peel. Chop roughly, then use a rocking motion, keeping the knife tip on the board, to mince finely. Add a pinch of salt to aid in breaking down the fibers and create a paste if desired.
- Herbs (e.g., Parsley, Cilantro): Gather herbs into a tight bundle. Use a rocking motion to finely chop. For very fine results, chop, gather, and chop again.
Actionable Takeaway: Practice these techniques to achieve consistent sizing, which directly impacts the taste and presentation of your meals.
Julienne and Batonnet: Precision Cuts
These cuts are a hallmark of professional food preparation, indicating precision and care. They are often used for vegetables in stir-fries, salads, or as garnishes.
- Batonnet: French for “small stick.” This cut yields pieces approximately ¼ inch x ¼ inch x 2-2½ inches long. Think of thick-cut French fries.
- Julienne: French for “matchstick.” This is a finer cut, typically ⅛ inch x ⅛ inch x 2-2½ inches long.
Practical Example: To julienne a carrot: square off the carrot by trimming its sides, then slice it into even ⅛-inch thick planks. Stack these planks and cut them lengthwise into ⅛-inch wide sticks.
Beyond Basic Cuts: Advanced Techniques and Efficiency
Once you’re comfortable with the basics, advanced knife skills open up new avenues for presentation, flavor development, and kitchen efficiency.
Breaking Down a Whole Chicken
Learning to butcher a whole chicken saves money and allows for fresher, customized cuts.
- Key Principle: Cut through joints and cartilage, not bone. Feel for the natural seams.
- Steps:
- Remove the backbone (spatchcock) or separate legs and wings first.
- Separate thighs from drumsticks.
- Remove breasts from the rib cage.
- Trim any excess fat or skin.
Benefit: You get fresh chicken parts, and the backbone and carcass can be used for homemade stock, enriching your culinary repertoire.
Segmenting Citrus (Supremes)
This elegant technique removes all pith and membrane from citrus, leaving only the juicy fruit segments.
- Method:
- Top and tail the fruit (cut off both ends).
- Place the fruit on one of the cut ends. Using a sharp knife, carefully slice downwards, following the curve of the fruit, to remove all peel and white pith.
- Hold the peeled fruit over a bowl. Slice along one side of a membrane towards the center of the fruit, then slice along the other side of the same membrane to release the segment (supreme).
- Repeat until all segments are removed. Squeeze the remaining core to extract any juice.
Practical Use: Perfect for salads, desserts, and elegant garnishes, ensuring a pure, unbitter citrus experience.
Chiffonade for Leafy Greens
The chiffonade cut produces fine ribbons of leafy greens or herbs, ideal for garnishes or uniform distribution in dishes.
- Technique: Stack several leaves (e.g., basil, spinach), roll them tightly into a cigar shape, and then slice across the roll with a very sharp knife to create thin ribbons.
Benefit: A professional and attractive presentation, along with a delicate texture that integrates well into sauces and salads.
Knife Care and Maintenance
A sharp, well-maintained knife is a joy to use and a safer tool. Neglecting your knives diminishes their performance and lifespan.
Keeping Your Edge: Sharpening vs. Honing
These two terms are often confused, but they serve distinct purposes.
- Honing: Realignment of a knife’s edge. A honing steel (or ceramic rod) straightens the microscopic edge that gets bent over with use. This should be done frequently, even daily, before or after each use. It doesn’t remove metal.
- Sharpening: Actually grinds away a small amount of metal from the blade to create a new, sharper edge. This is done less frequently (e.g., every few months to once a year, depending on use). Methods include whetstones, electric sharpeners, or professional sharpening services.
Statistic: Studies show that 80% of kitchen knife injuries are caused by dull knives, which require more force to cut and are more prone to slipping. Regularly honing and sharpening your knives is a critical safety measure.
Actionable Takeaway: Learn to use a honing steel effectively; it’s the simplest way to maintain a sharp edge between professional sharpenings.
Cleaning and Storage
Proper cleaning and storage protect your investment and ensure hygiene.
- Hand Wash Immediately: Always wash knives by hand immediately after use with warm, soapy water. Avoid leaving them to soak, as this can corrode the blade or damage the handle.
- Dry Thoroughly: Completely dry your knives immediately after washing to prevent rust and water spots.
- Proper Storage:
- Knife Block: Protects blades and keeps them easily accessible.
- Magnetic Strip: Saves counter space and allows for easy selection.
- In-Drawer Tray: Keeps knives safe and organized if counter space is limited.
Extending Knife Lifespan
A few simple practices can significantly prolong the life and performance of your knives.
- Avoid the Dishwasher: The harsh detergents, high heat, and jostling in a dishwasher can dull the blade, damage handles, and cause corrosion.
- Use Appropriate Cutting Surfaces: Wooden or high-quality plastic cutting boards are best. Avoid glass, stone, or metal surfaces, which will quickly dull your blade.
- Use the Right Knife for the Job: Don’t use your chef’s knife to hack through bones or pry open cans; this will damage the blade.
Actionable Takeaway: Treat your knives with respect, and they will serve you reliably for years to come.
Conclusion
Mastering knife skills is an investment in your culinary journey, transforming you from a hesitant chopper into a confident creator. From the foundational principles of safe handling and proper grip to the finesse of advanced cuts and meticulous care, each step builds upon the last, enhancing your efficiency, ensuring safety, and elevating the quality of your dishes. The journey to becoming proficient is one of patience and practice, but the rewards are immense: greater enjoyment in the kitchen, perfectly prepared ingredients, and the satisfaction of knowing you’ve truly honed a vital craft. So, pick up your knife, embrace the challenge, and start slicing your way to culinary excellence today!